
T his cute card is made with two products from the Sale-A-Bration catalog.
Project Recipe

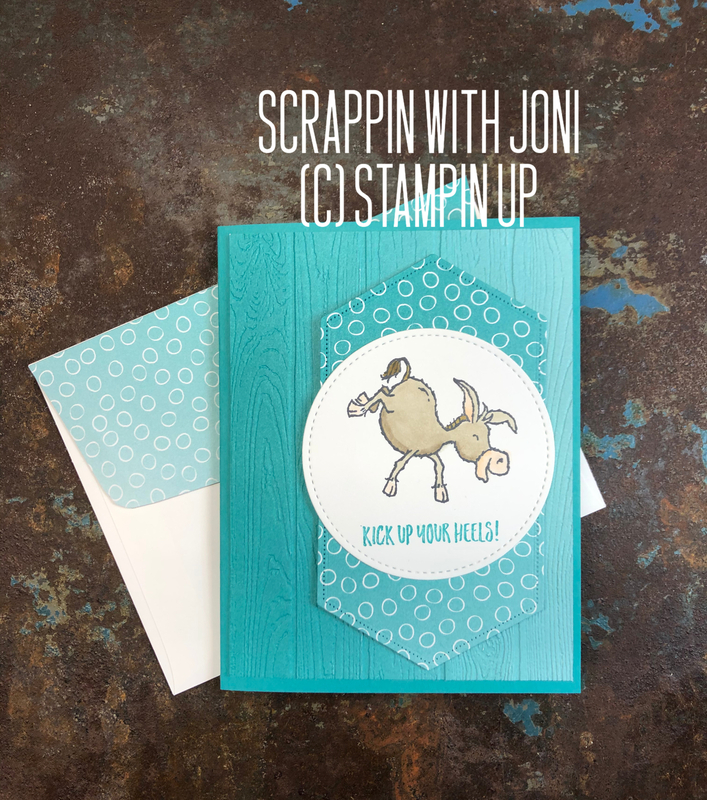
Card Base: Cut Bermuda Bay 8 ½ X 11 paper in half widthwise. You now have two pieces 8 ½ X 5 ½ . Fold one of the pieces in half lengthwise for your card front. The card front now measures 4 ¼ X 5 ½.
Card Front: Cut paper from Oh So Ombre paper 4 X 5 ¼, emboss with the Pinewood Planks embossing folder. Attach this piece to Bermuda Bay card base.
From the Stitched Nested Labels, die cut the largest label from the circle print Oh So Ombré paper.
Die cut the largest circle from the Stitched Shapes dies, from white card stock. Stamp the kicking donkey with tuxedo black memento ink on the stitched white circle. Stamp this near the top of the circle to leave enough room for sentiment on the circle.
Stamp sentiment from Zany Zebras stamp on the lower edge of the circle with Bermuda Bay ink. Color the donkey with Blends, I used Crumb Cake, Soft Suede, and Petal Pink.
Attach the stamped circle to the center of the circle print nested label die cut piece. Attach these pieces to card front with Stampin dimensionals.
That’s it; you have finished your card front. For the inside of your card, cut a piece of Whisper White 4 X 5 ¼. Stamp a sentiment or write a note before attaching this piece inside your card.

If you want to cover your envelope flap to match your card, you can find directions here: http://www.scrappinwithjoni.com/blogs/covering-your-envelope-flap